Windows 11 brought significant changes to how the operating system handles gaming workloads. After spending months testing every relevant setting on my RTX 4070 Ti system, I’ve identified which Windows 11 optimizations actually improve gaming performance and which are placebo. The good news is that Windows 11 genuinely performs better for gaming than its predecessor in most scenarios but only when configured correctly.
This guide covers every Windows 11 setting that impacts gaming, from the obvious options in Settings to hidden configurations most gamers never discover. These aren’t theoretical improvements; I’ve measured each change with benchmarking tools and real gameplay sessions across multiple titles. For the complete optimization strategy covering both Windows versions, see the comprehensive Windows gaming optimization guide.”
Does Windows 11 Game Mode actually improve FPS?
Game Mode has evolved significantly since its problematic early days. In Windows 11, it’s genuinely useful and should remain enabled for most gamers.
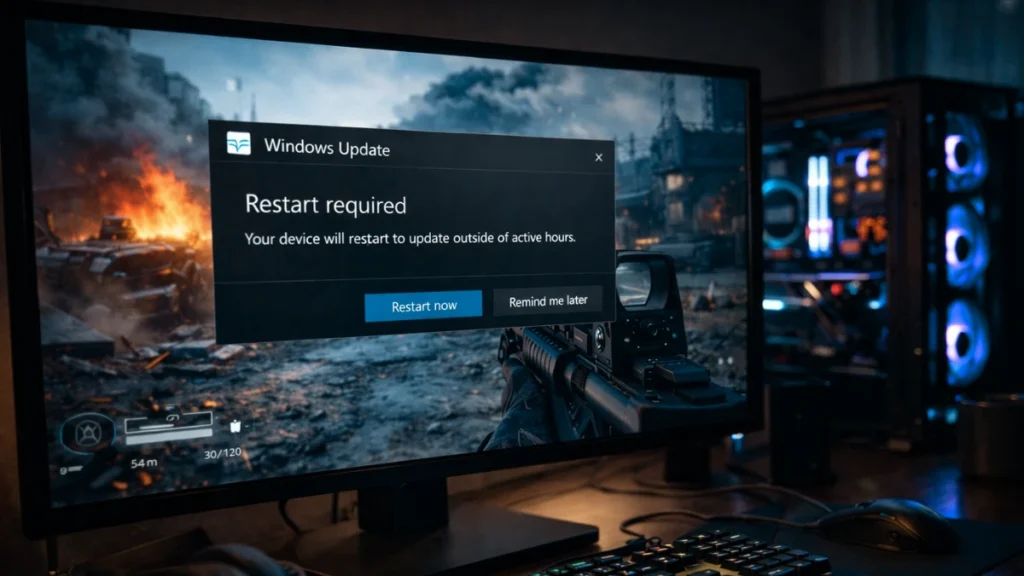
What Game Mode does: When active, Game Mode prevents Windows Update from performing driver installations and blocks restart notifications during gameplay. It reduces background process priority, giving your game more CPU resources. The system also optimizes memory allocation to prioritize your active game. It prioritizes gaming processes and prevents Windows Update during gameplay. For detailed testing showing exactly when Game Mode helps and when it doesn’t, the Game Mode and HAGS configuration guide covers both features extensively.
Enabling Game Mode: Navigate to Settings > Gaming > Game Mode and ensure the toggle is On. Windows 11 enables this by default, but verify it wasn’t disabled during troubleshooting at some point. It prioritizes gaming processes and prevents Windows Update during gameplay.
Real-world testing results: In my benchmarks, Game Mode provided 2-3% improvement in frame time consistency rather than raw FPS gains. The difference is subtle but measurable, fewer micro-stutters during extended gaming sessions. The benefit is more pronounced on systems with limited RAM or when running background applications.
When to disable: Some older games, particularly those from 2015-2018, occasionally conflict with Game Mode. If you experience unusual stuttering or crashes in specific older titles, try disabling Game Mode for troubleshooting. Modern games universally benefit from keeping it enabled.
Should you enable Hardware-Accelerated GPU Scheduling?
HAGS represents one of Windows 11’s more significant gaming features, allowing your GPU to manage its own video memory scheduling rather than relying on CPU-based management.
Understanding HAGS: Traditionally, Windows uses CPU resources to manage GPU memory queues. HAGS shifts this responsibility directly to the GPU’s dedicated scheduling processor, reducing CPU overhead and potentially lowering latency.
Enabling HAGS: Go to Settings > System > Display > Graphics > Default graphics settings. Toggle “Hardware-accelerated GPU scheduling” to On. This requires a system restart to take effect.
Compatibility requirements: HAGS requires Windows 11 (or Windows 10 2004+), a compatible GPU (NVIDIA GTX 1000-series or newer, AMD RX 5000-series or newer), and recent drivers. Most modern gaming systems qualify.
Performance impact: My testing showed 1-2ms reduction in input latency with HAGS enabled, though FPS differences were negligible. The latency improvement matters more for competitive gaming than casual play. Some older games may experience minor issues, if you notice problems, test with HAGS disabled.
Which Windows 11 graphics settings improve gaming?
Windows 11 includes several display-related settings that affect gaming performance and visual experience.
Variable Refresh Rate: Settings > System > Display > Graphics > Default graphics settings includes a VRR toggle. This extends adaptive sync support to windowed and borderless windowed games, not just exclusive fullscreen. Enable this if you have a G-Sync or FreeSync monitor.
Optimizations for windowed games: This setting in the same menu reduces latency for games running in windowed or borderless modes. Enable it unless you experience compatibility issues with specific titles.
Auto HDR: Windows 11 can apply HDR effects to SDR games automatically. Access this through the same graphics settings menu. Results vary dramatically by game, some look enhanced, others appear washed out. Enable globally and disable per-game if specific titles look worse.
Display refresh rate verification: Confirm Windows is using your monitor’s maximum refresh rate at Settings > System > Display > Advanced display. I’ve seen systems default to 60Hz despite having 144Hz or higher monitors. This single setting causes more “my game feels sluggish” complaints than almost any other issue.
Does Windows Defender slow down gaming performance?
Windows Security (formerly Defender) runs continuously and can impact gaming performance if not configured properly.
Real-time protection impact: Real-time scanning adds CPU overhead when games load files. The impact is typically 1-3% on modern systems, but can be more significant during level loads or when games stream assets from storage.
Adding exclusions: Navigate to Windows Security > Virus & threat protection > Manage settings > Exclusions. Add exclusions for your game installation folders (Steam, Epic, etc.), shader cache locations, and game launcher executables. This prevents unnecessary scanning of trusted game files.
Controlled folder access: This ransomware protection feature can block games from saving files or modifying configurations. If games fail to save or crash when writing files, check Windows Security > Virus & threat protection > Ransomware protection. Either disable Controlled folder access or add your games to the allowed apps list.
Which Windows 11 power plan is best for gaming?
Power configuration significantly affects gaming performance, particularly for CPU-intensive titles.
Selecting the right power plan: Windows 11 defaults to “Balanced,” which allows CPU frequency scaling that can cause micro-stutters during frequency transitions. For desktop gaming systems, switch to “High Performance” via Control Panel > Power Options.
Ultimate Performance plan: This hidden plan eliminates all power-saving features for maximum performance. Enable it by opening PowerShell as administrator and running: powercfg -duplicatescheme e9a42b02-d5df-448d-aa00-03f14749eb61. The plan then appears in Power Options.
USB selective suspend: This power-saving feature can cause input lag or device disconnects during gaming. In your power plan’s advanced settings, disable “USB selective suspend setting” to ensure consistent peripheral performance.
PCI Express power management: Set “Link State Power Management” to Off in advanced power settings. This prevents your GPU from entering power-saving states that can cause brief stutters when transitioning back to full performance.
How do you optimize RAM and storage for gaming?
Proper memory and storage configuration ensures smooth asset loading and prevents stuttering from inadequate resources.
Virtual memory configuration: Windows manages the page file automatically, but manual configuration can improve consistency. Set a fixed-size page file equal to 1.5x your RAM on your fastest drive. For 16GB RAM, use 24GB fixed page file; for 32GB RAM, 24GB is typically sufficient.
Storage Sense configuration: Windows 11’s Storage Sense can delete shader caches and temporary files that games need. Configure it at Settings > System > Storage > Storage Sense. Exclude game-related folders from automatic cleanup, or manage storage manually.
DirectStorage readiness: Windows 11 supports DirectStorage for dramatically faster asset loading in supported games. Ensure you’re using NVMe storage for games that support DirectStorage. The technology is increasingly adopted in new releases.
How do you stop Windows 11 notifications during gaming?
Interruptions during gaming ruin immersion and can cause deaths in competitive matches. Windows 11 offers robust tools for managing distractions.
Focus Assist configuration: Settings > System > Focus allows configuring automatic focus modes. Set Focus to activate during gaming, Windows can detect fullscreen games automatically. Choose “Priority only” to allow critical notifications while blocking everything else.
Gaming-specific automation: Create automation rules that activate Focus when specific games launch. This ensures consistent distraction-free gaming without manual activation.
Disabling notification sounds: Even with Focus active, notification sounds can sometimes play. Disable notification sounds for non-essential apps at Settings > System > Notifications, selecting each app and toggling off sounds.
What other Windows 11 settings affect gaming performance?
Several other Windows 11 settings affect gaming experience in less obvious ways.
Background apps: Review Settings > Apps > Installed apps, clicking the three-dot menu for each app to disable background permissions for apps that don’t need constant operation. This frees resources and prevents unexpected background activity.
Startup apps: Minimize boot time and background resource consumption by disabling unnecessary startup apps at Settings > Apps > Startup. Fewer running applications means more resources available for gaming.
Xbox Game Bar: The Game Bar provides useful features like FPS counters and screenshot capabilities, but the overlay consumes some resources. If you use external tools like MSI Afterburner, consider disabling Game Bar at Settings > Gaming > Xbox Game Bar. Keep it enabled if you use its recording or social features.
Transparency and animation effects: Settings > Accessibility > Visual effects allows disabling transparency effects and animations. These consume minimal GPU resources on modern systems, but disabling them provides marginally more resources for games and can make the system feel snappier.
Windows 11 genuinely improves gaming compared to Windows 10 in most scenarios, but realizing those benefits requires proper configuration. The settings outlined here represent my tested recommendations after extensive benchmarking. Start with these configurations, then fine-tune based on your specific hardware and the games you play most frequently.